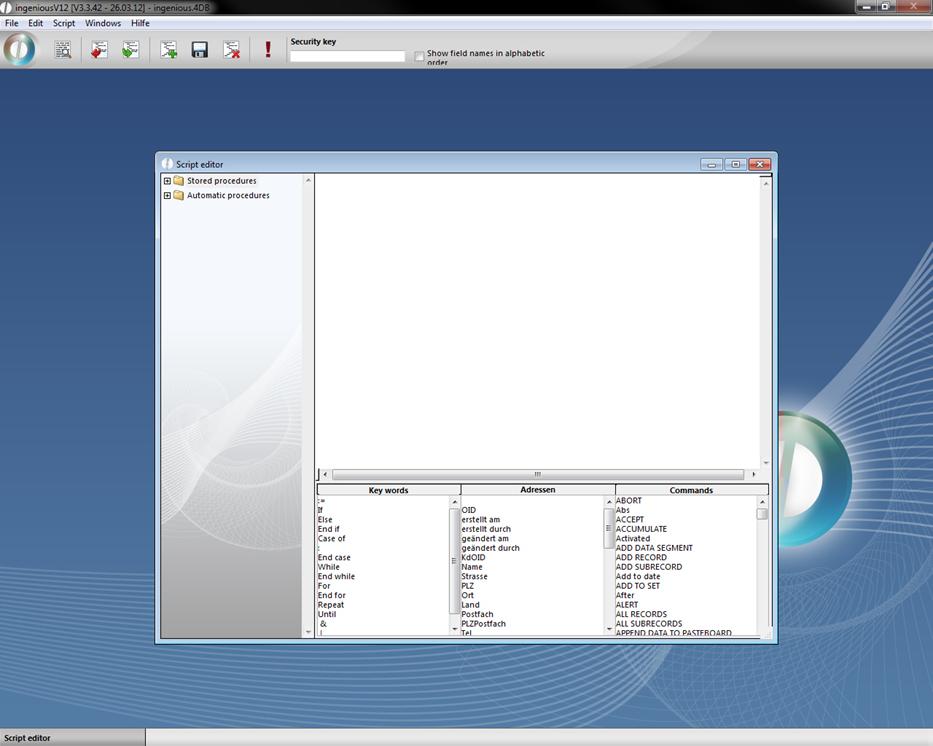
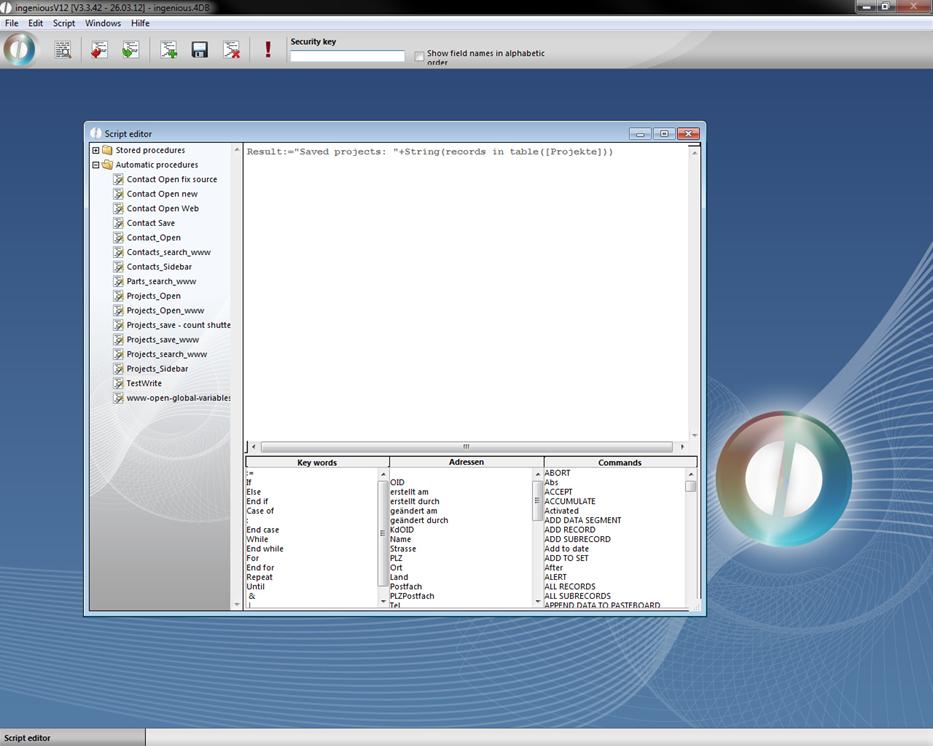
The “Free data manipulation” is one of the most powerful tools of Ingenious.V12. The “Script editor” offers all possibilities to be able to create and explain scripts quickly.
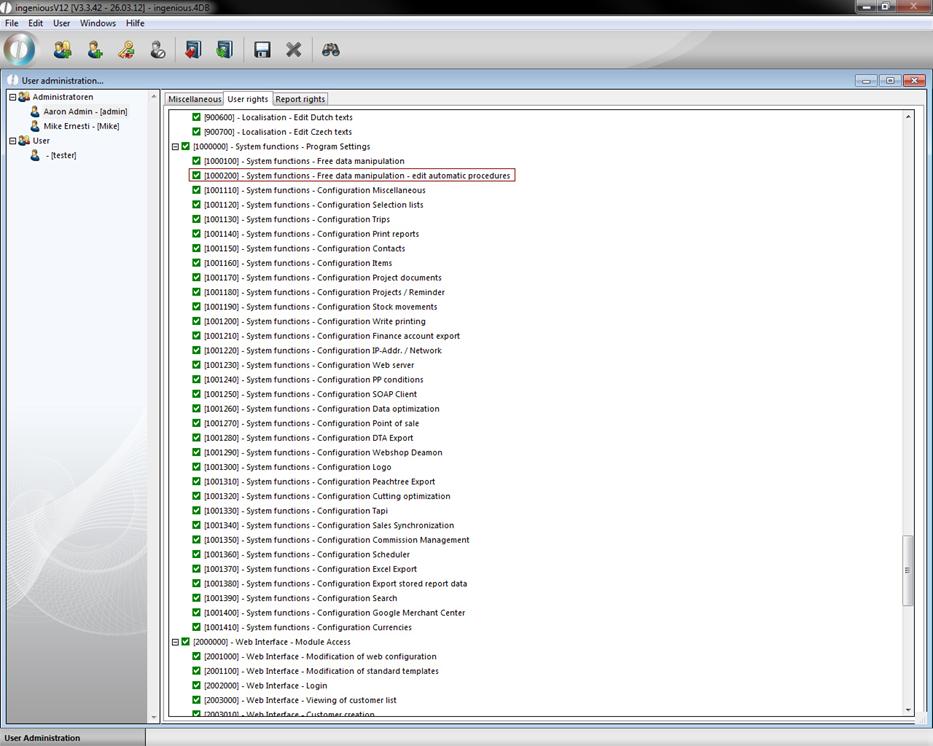
Ingenious.V12 contains two types of scripts: stored procedures and automatic procedures. The difference lies in the usage and execution of the scripts. Whereas stored procedures can be assigned generally to a module and can be executed in the list view, automatic procedures can be assigned to a specific work step of a module and will be executed, when this work step happens. For instance after opening a module, saving a function or executing a search or print action. To create and modify automatic procedures the specific user right has to be enabled.
The following practice will show an example for a stored procedure. The usage of the automatic procedures is done analogue.
Practice creating scripts
-
Click on the button in order to create a new script.
-
Next give the script a method name
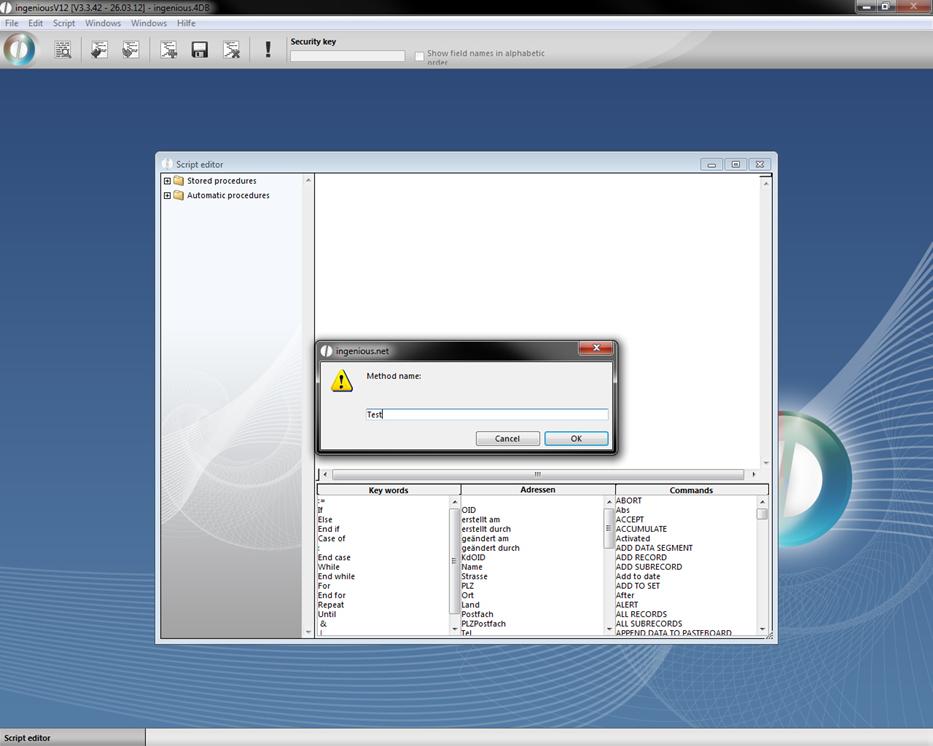
Window for naming a script
-
Create your script in the script area.
CW_SetPrefs
CW_SetDate (Current date(*))
CW_OpenDialog
If (OK=1)
QUERY([Projekte];[Projekte]Gedruckt am=cwSelectDate)
End if
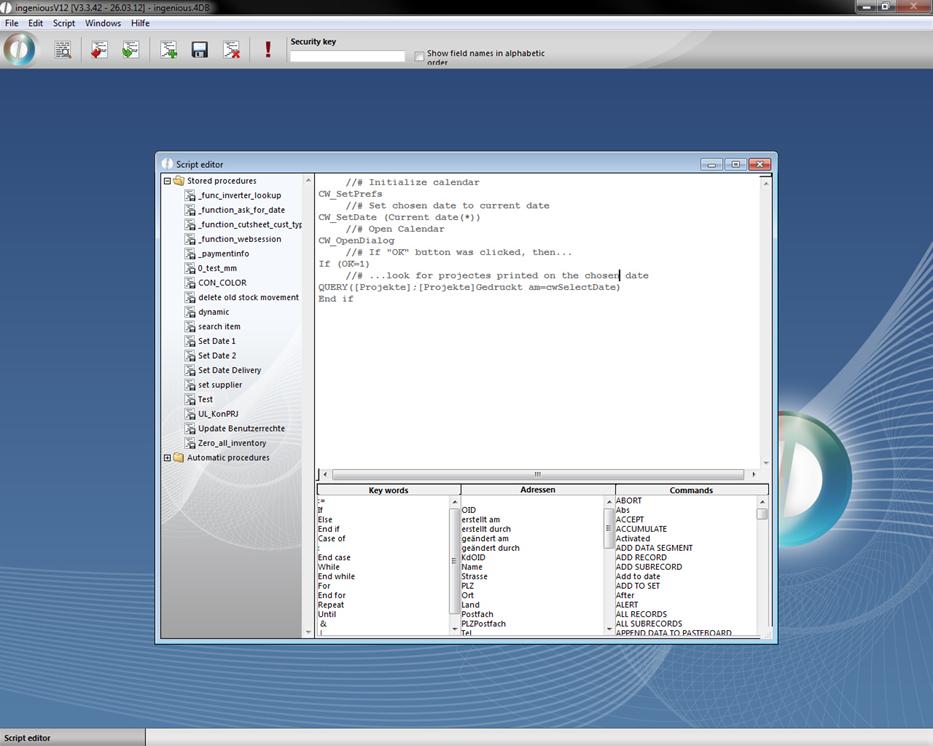
You can arrange scripts either with the keyboard input or by clicking on key words, addresses and commands.
-
Secure your script with the button, before you run it for the first time.
-
In order to start the script later, a click on the button suffices.
Scripts that change data (deleting, creating and updating records), are automatically recognized by Ingenious.V12 and their execution is permitted only with a security key. You get this unique release code after checking the scripts from Ingenious GmbH. Pay attention to the fact that only people with enough specialized knowledge can create and execute scripts.
Warning: Scripts allow access to internal data that is outside of the Ingenious.V12 user rights.
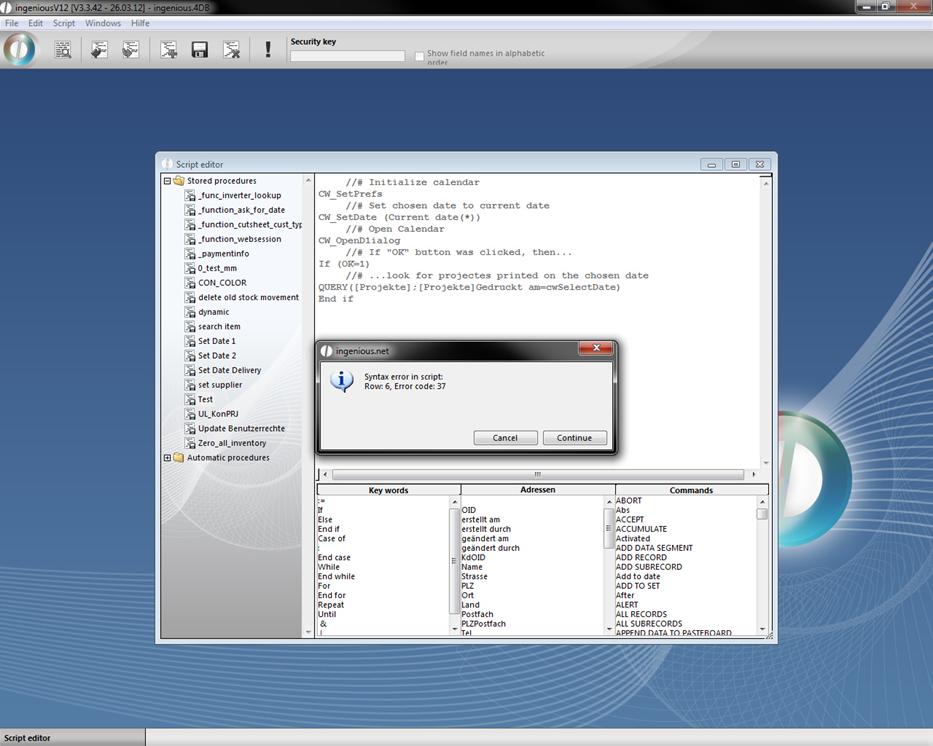
If something is wrong with the script the following error message will be displayed. You can abort the procedure and correct the script.
Furthermore, it is possible to assign the scripts to certain modules. Therefore only the people who also own the suitable module rights can execute the scripts.
Practice assigning scripts
-
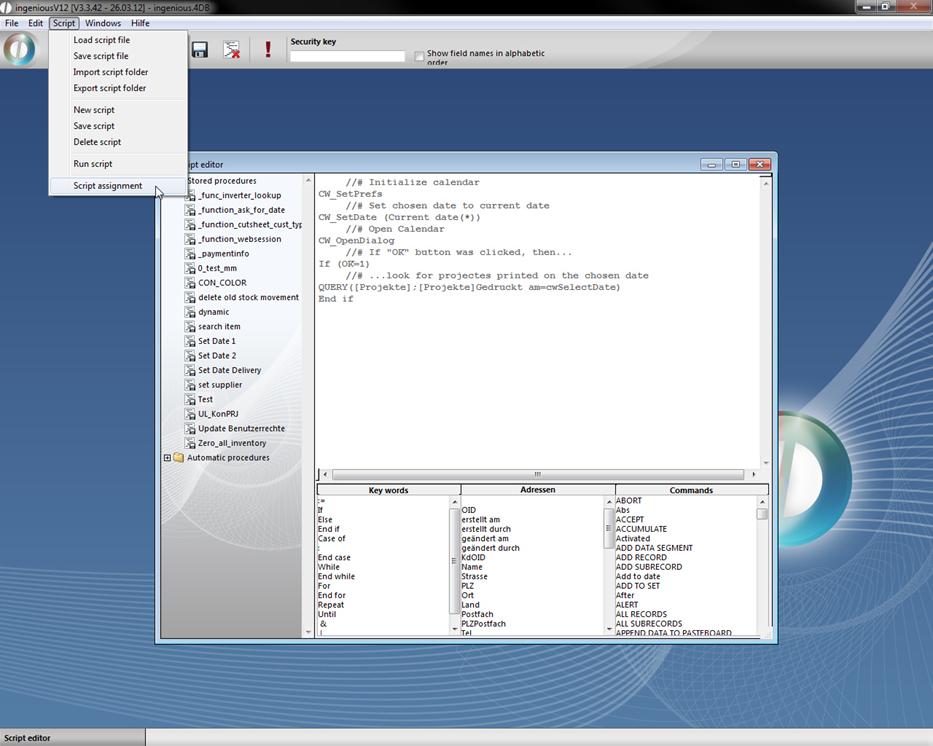
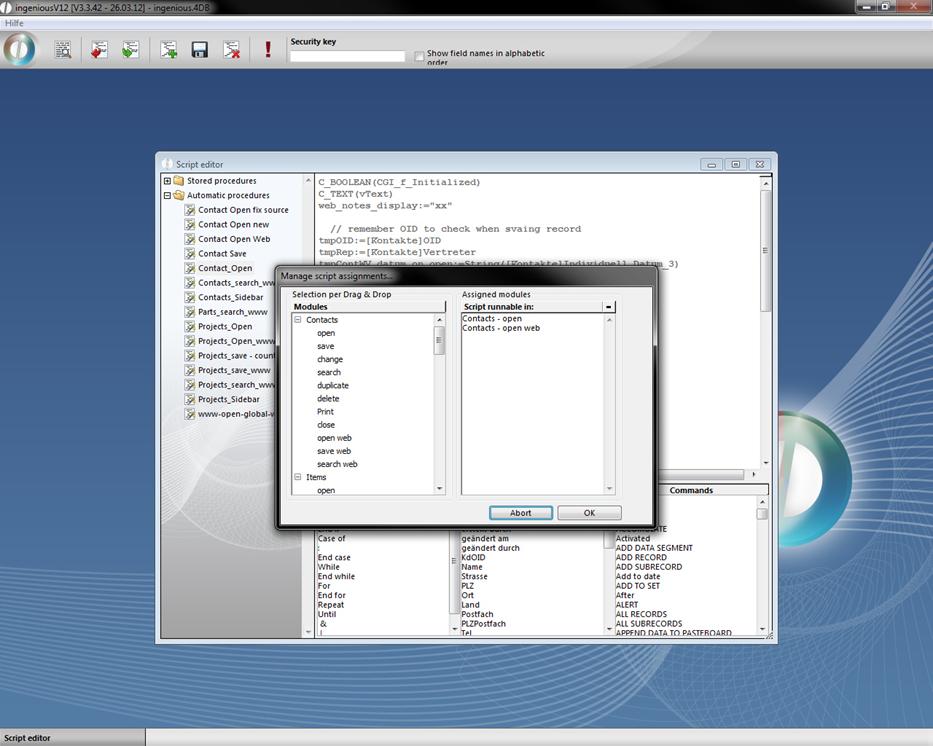
Mark the script “Demo-Script1” and select the menu “Script/Script assignment”.
-
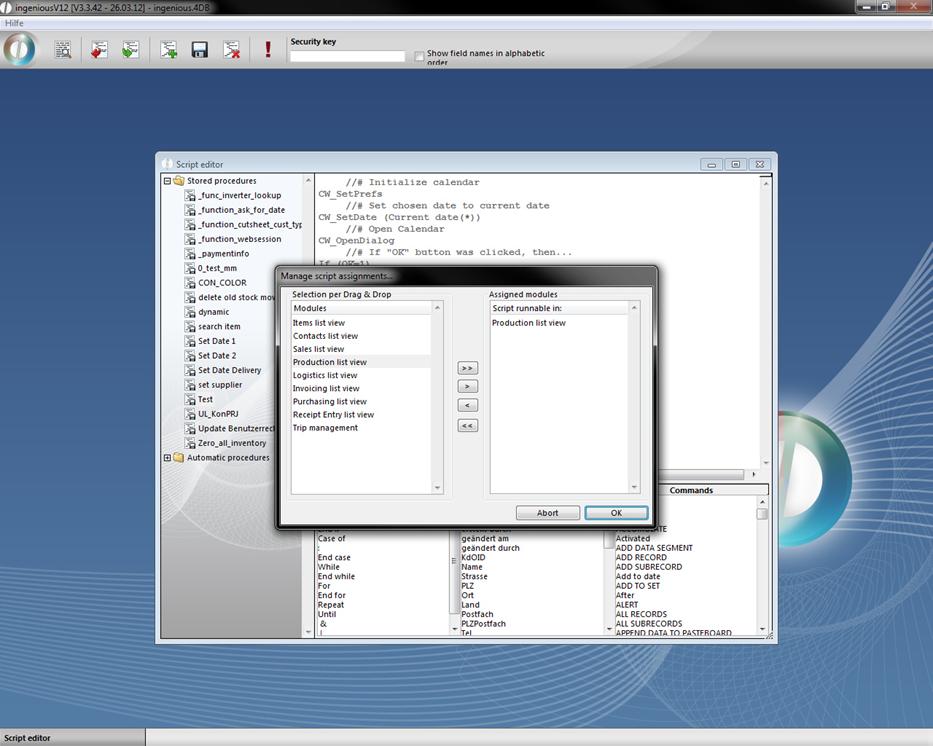
Assign the desired modules to the script with the Drag & Drop and click on the “OK” button.
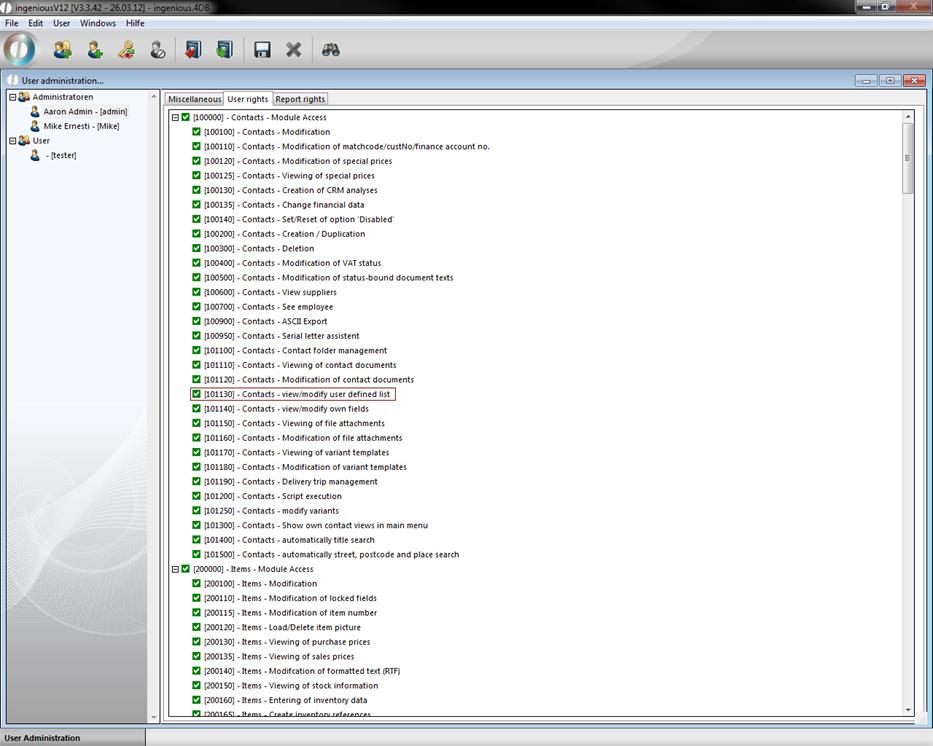
Now the scripts are entitled to everybody with the suitable module right. The rights allocation occurs in the tab “User rights” of the user administration.
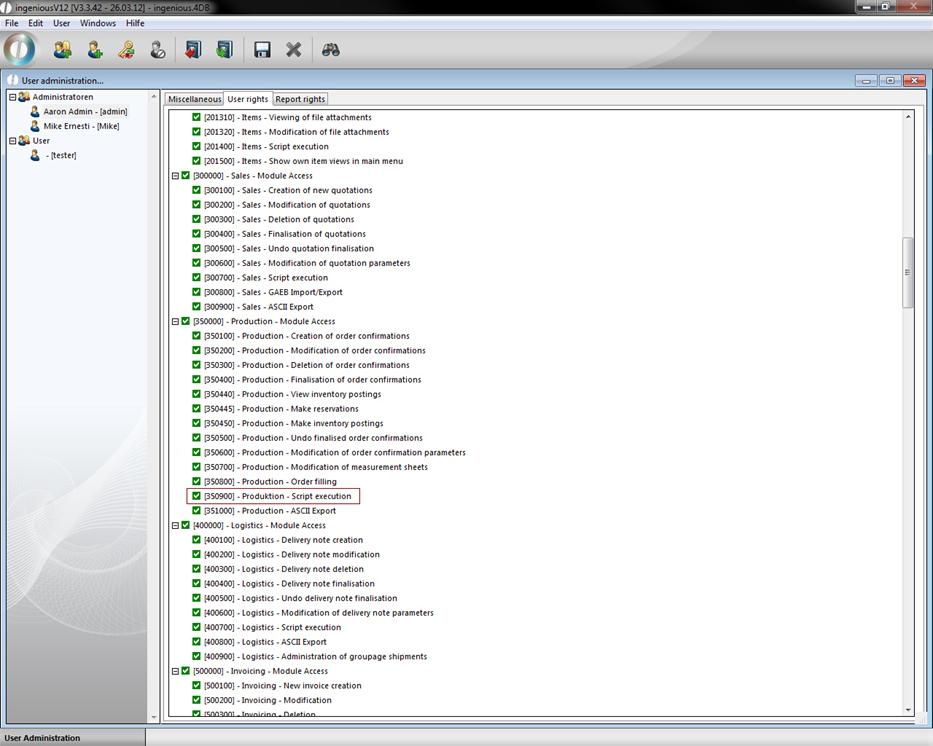
Rights allocation for the “Invoicing” module
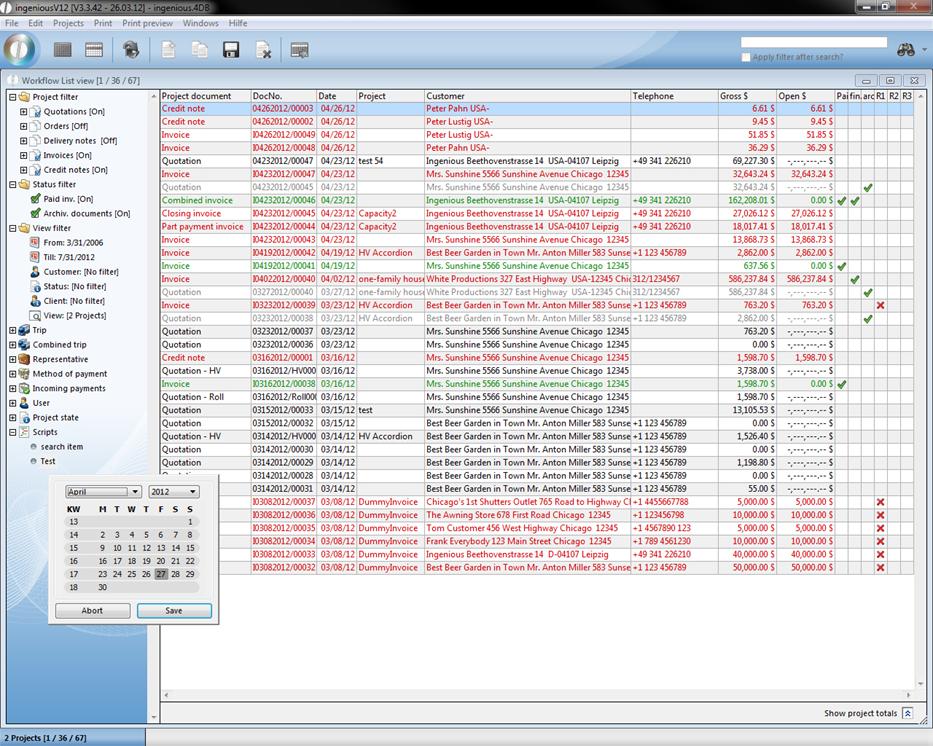
A new folder “Scripts” is available to the authorized user in the list view of the module. Here the user finds all scripts available to him. The execution occurs only by clicking the scripts. In order to test a script from Ingenious GmbH, it must be exported first.
Attention: When assigning an automatic procedures script, you can define on which work step the script is automatically executed.
Practice exporting scripts
-
In the free data manipulation, you export the script in a text file by clicking on the button.
The Windows standard window follows to store files.
-
Give the export data a name and set the procedure in motion with the “Save” button.
If you have saved the file, you can now find the corresponding icon.
In order to get a security key for this script, send this file to Ingenious GmbH. If your script was corrected, you get a new text file (New Script) and a second file with the security key sent to you.
Practice importing scripts
-
Click on the button.
-
Open the file in the Windows dialogue.
Now you must still enter/copy the safety key in the corresponding field and click on the
 button.
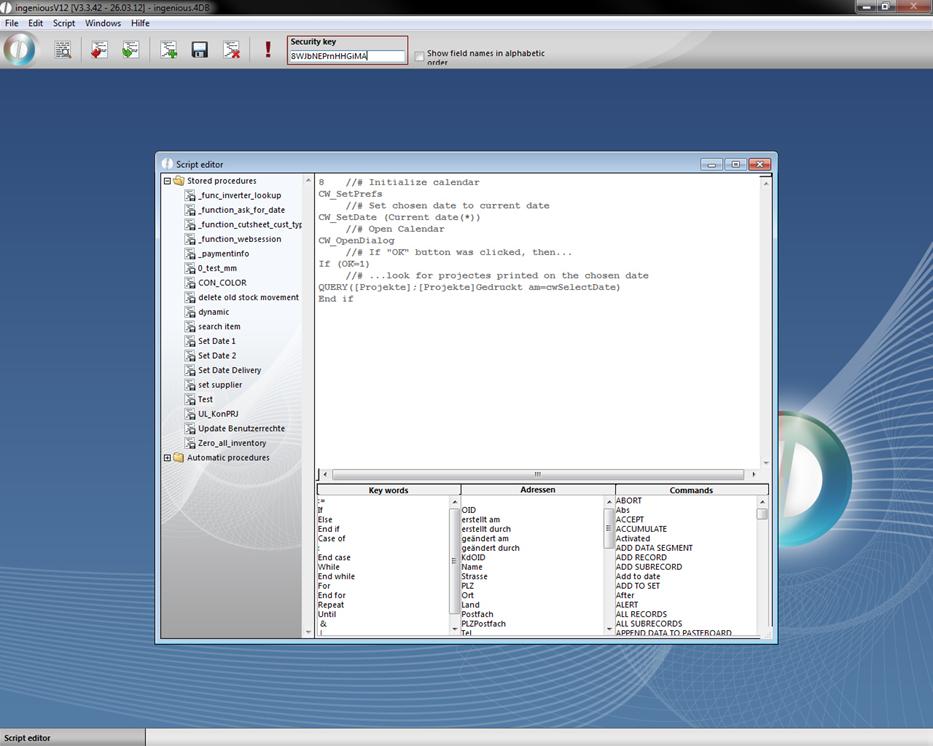
In order to execute the script again, you need a new safety key.
Attention: Because these scripts can only be created with internal knowledge about complex correlations in the database systems, only qualified persons should have access to this module. Of course Ingenious GmbH representatives are willing to help with the creation of individual scripts.
With the menu entry Script – Import script folder or – Export script folder you can load or save whole folders.

Exec_Script
Exex_Script is an external command to execute scripts in any place that allows 4D code, for instance write and view documents. Exec_script can also be used as a place holder {Exec_Script(“script name”;”param1”;”param_n”)}. By this means text templates and script can be composed dynamically, that raises the flexibility of ingenious.V12.
Attention: In this scripts the output command “Result:=” has to be used.
Practice
1. Open the free data manipulation module and add a script to the automatic procedures with the name “TestWrite” and content “Result:="Saved projects: "+String(records in table([Projekte]))”. With the help of this script the number of saved projects in ingenious.V12 should be output.
Option 1 as 4D expression
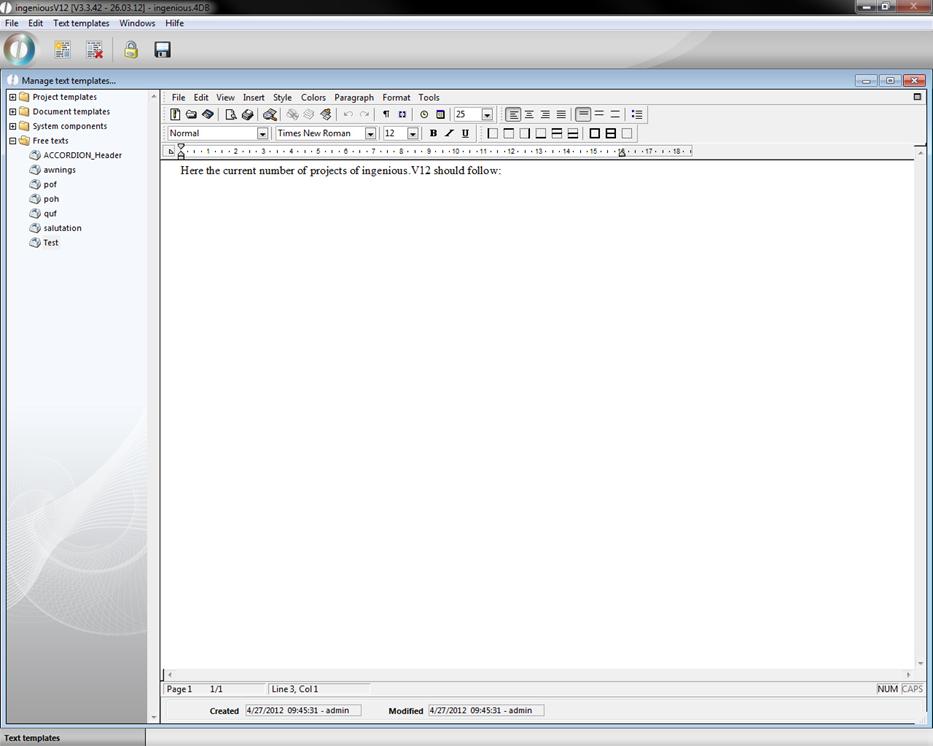
2. Switch to the template administration and create a new one in the category “free texts” named “Test”.
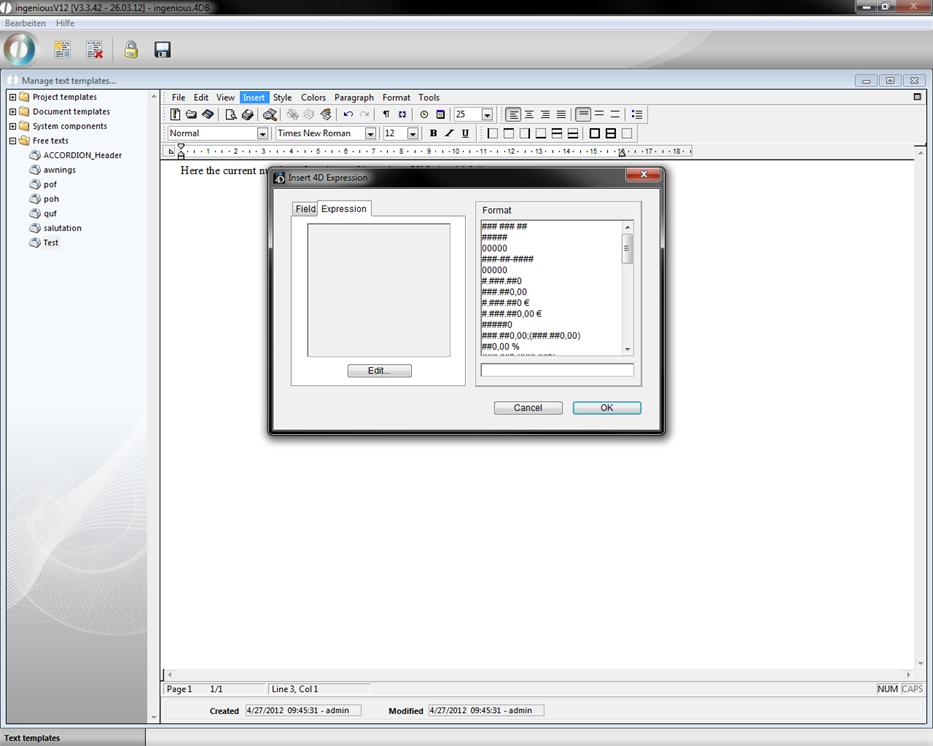
3. Select “4D Expression” in the menu “Insert”. In the upcoming window go to “Expression” and click on “Edit…”
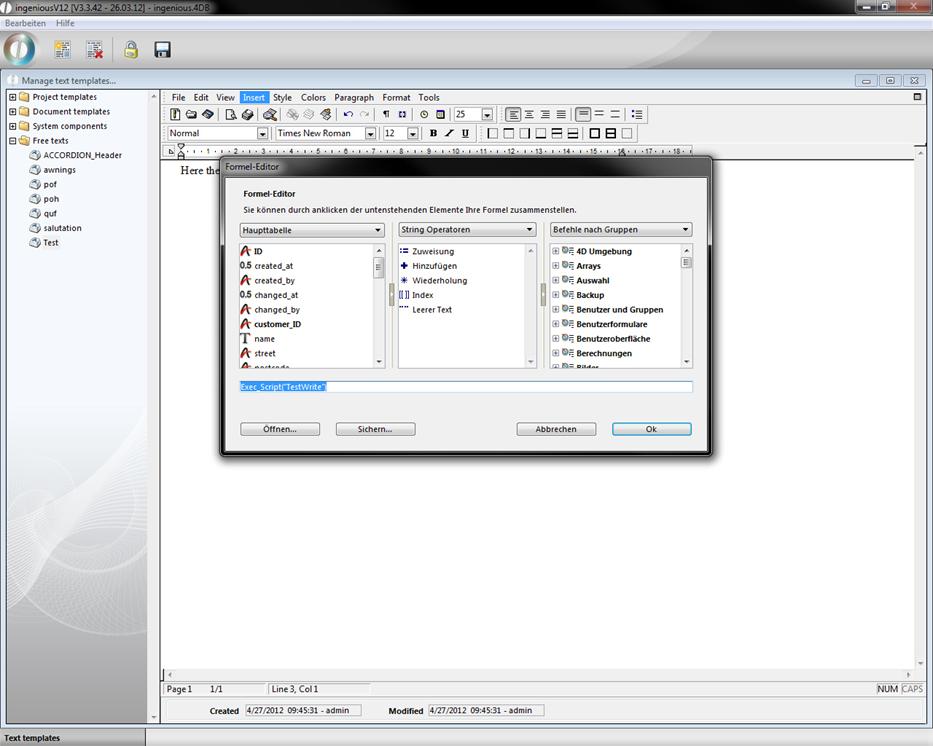
4. The formula editor will open up. Enter “Exec_Script("TestWrite")” in the input field and accept the changes by clicking “OK”.
5. In the 4D Expression window the new created command is displayed. Click on “OK” to insert it to the text template.

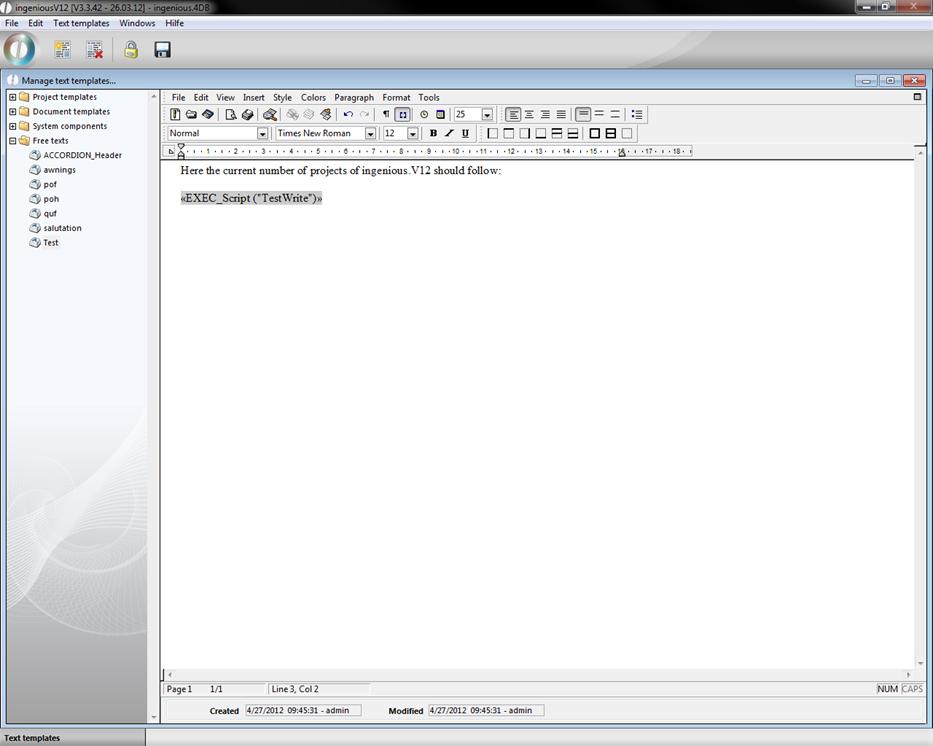
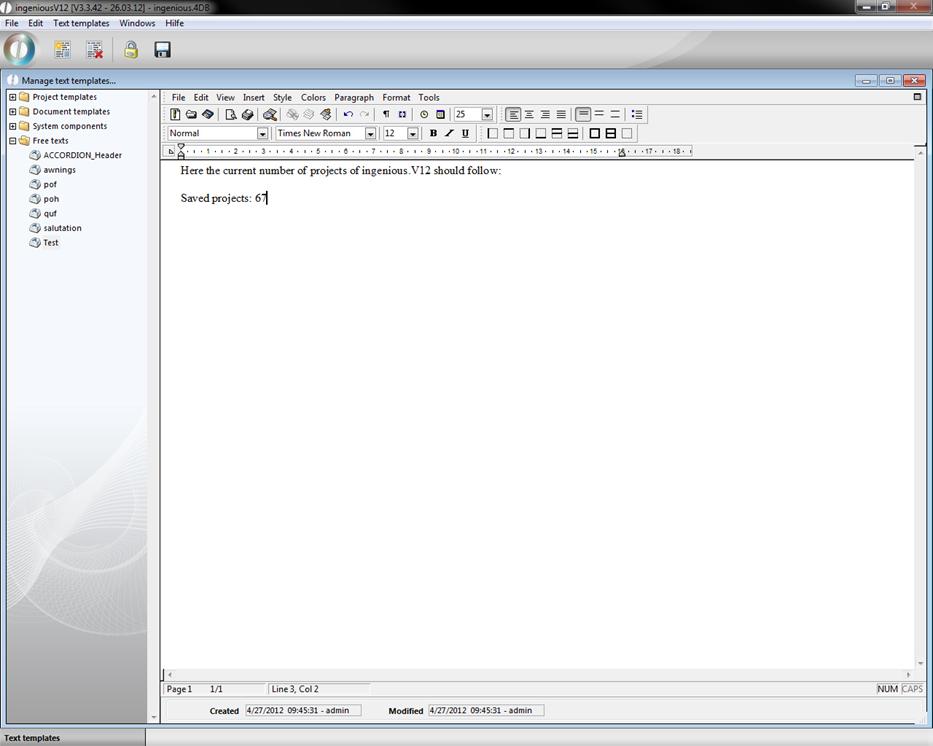
6. Now click on “References” in the menu “View” you toggle between the raw reference view and the executed view.
Option 2 as place holder
1. Create a new template “Test2” in the category “project templates” in the template administration.
2. Enter the placeholder “{Exec_Script("TestWrite")}”
In the print preview of the project template the place holder will be solved.

User defined lists
User defined lists (sidebars) are flexible customizable widgets, that support a faster input of several field in the detail view of a module. These lists are possible in the contact and item module and the workflow modules.
Attention: To be able to use the user defined lists in the contact module, the corresponding user rights have to be enabled. For the other modules you don’t need a specific user right.
Just create in the category “automatic procedures” in the free data manipulation module a script and assign it to the desired module. If you need any help with the creation of a script, an employee of the Ingenious GmbH will be happy to help you.
The following parameters/values are possible:
Parameter
Werte
Anmerkungen
LINES
Integer
Ex. "10"
The number of output lines in the table.
Initialize the table and has to be execute before all other commands.
“Line” can be empty/is not necessary.
_WIDTH
Integer
Ex. "300"
Pixel width of the table. Default value is 300.
“Line” can be empty/is not necessary.
_SPLIT
Number1; Number2
Ex. "15;20"
Aufteilung der Spalten im Verhältnis von Zahl1 zu Zahl2
Segmentation of the columns according to the ratio number1 to number2.
“Line” can be empty/is not necessary.
NAME
Text
Ex. "Firma/Name"
Name of the current line (left column)
FORECOLOR
Color oder
RGB (Number1,Number2,Number3)
Ex. "RGB(120,220,170)"
Color of the text in the left column (name). Available colors: red, green, blue, white, black, yellow or RGB-values.
BACKCOLOR
Color oder
RGB (Number1,Number2,Number3)
Ex. "red"
Color of the background color in the left column (name). Available colors: red, green, blue, white, black, yellow or RGB-values.
BIND
Field in the database
Ex. "[Kontakte]Name"
Displayed/changeable value (right column)
In the first version of the userlist only the table [Kontakte] can be used. The assignment to a generic table with any free definable fields is designated.
If no bind is stated, an assigned script will be executed on loading the table and the return value will be displayed.
CONTROL
Default selection
Ex. "Date"
The following values for the input type are available:
Combobox (only 4D 2003, in 2004 like dropdown)
DropDown; The available entrys are given in VALUELIST (see part VALUELIST)
Button = Button that can execute several actions (see part ACTION)
Boolean = Check Box
Text = simple text field; multiline possible (see part ROWCOUNT)
Integer
Float
Date
Time
ReadOnly = only output, no input possibilities
If an invalid value is entered, the line will be automatically formated correct when leaving or accepting the line.
ROWCOUNT
Integer
Ex. "3"
Defines the height of the line. For text fields a multiline input is possible.
ACTION
Default selection
Ex. "Script"
The following values are available:
Script = executes a script. The script name has to be delivered as a parameter in the VALUELIST.
Selectionlist = opens a Pop Up window with a selection list. The values of the selection list are given in the VALUELIST.
Multiselection = opens a Pop Up window with a multi selection list. The values for the multi selection list and the separator have to be given in the VALUELIST.
The action „script“ can be used for most of the line types (text, date, time, etc.). Scripts assigned to a button are executed when the button is clicked or by pressing return. Scripts assigned to readonly fields will be executed on pressing return and on creation of the table. For all other fields the scripts are executed after the data hast changed.
The script variable Param1 contains the current user input. If this value should be modified, the script variable Result has to be filled with the desired return value.
The actions “selectionlist” and “multiselection” can only be assigned to a button.
VALUELIST
Script name or value list
Contains the script name for the action „script“ or a list of values for combo boxes, drop down menus, selection lists or multi selection lists.
As separator for the particular values of the value list a line break (char 13), semicolon or comma is possible. For the action “multiselection” a 4. Parameter for the separator in the linked field can be given to the API function UserList.
The definition of the table is done with the API interface UserList("Line";"parameter";”value")
Example:
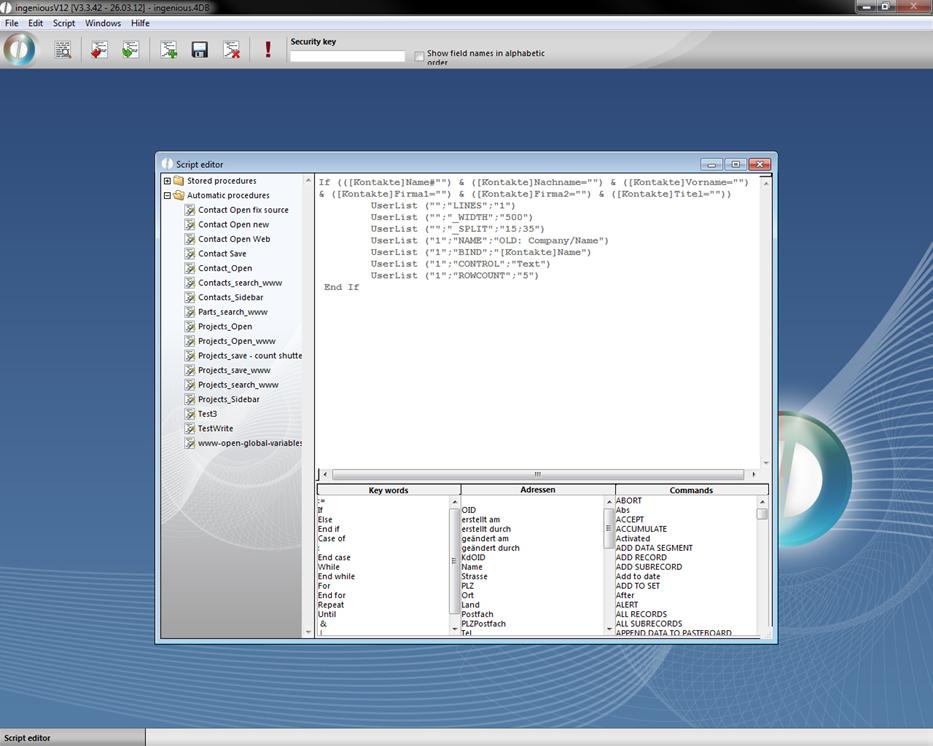
In the conversion from the simple to the extended entry mask in the program settings the input field “Name / Company” is dismissed and the input fields Name/Forename/Company/Company2… are visible. To display the old name field in existing contacts the following script has to be executed when opening the contacts module.
If (([Kontakte]Name#"") & ([Kontakte]Nachname="") & ([Kontakte]Vorname="") & ([Kontakte]Firma1="") & ([Kontakte]Firma2="") & ([Kontakte]Titel=""))
UserList ("";"LINES";"1")
UserList ("";"_WIDTH";"500")
UserList ("";"_SPLIT";"15;35")
UserList ("1";" NAME";"OLD: Company/Name")
UserList ("1";"BIND";"[Kontakte]Name")
UserList ("1";"CONTROL";"Text")
UserList ("1";"ROWCOUNT";"5")
End If
Old contacts will be displayed like this:
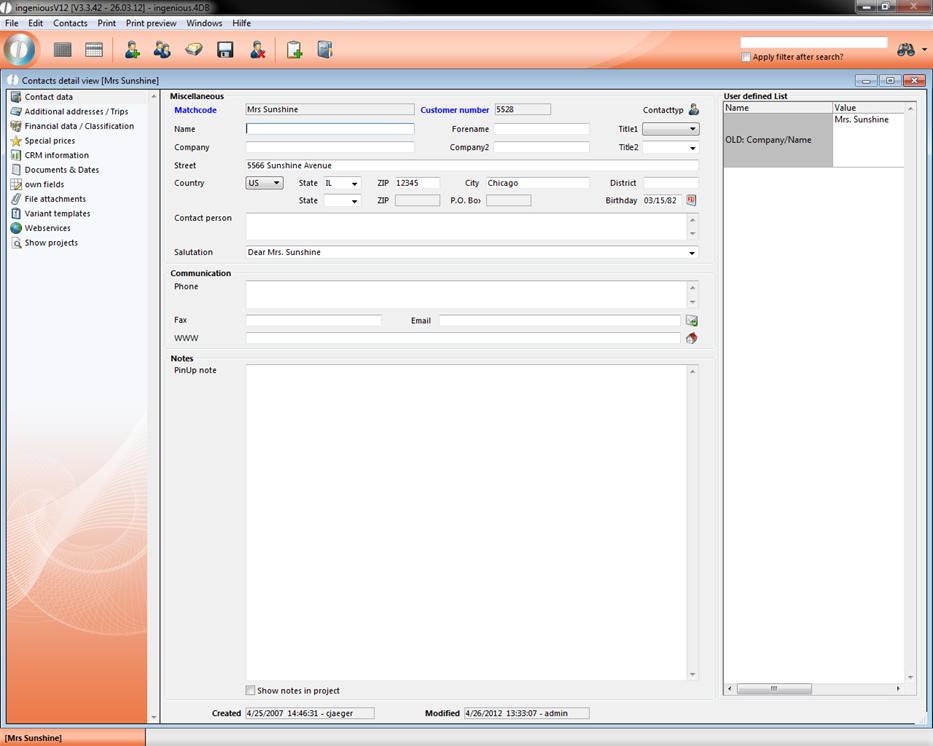
-
Individual methods and forms
With the individual scripts own forms and functions can be programmed.
Example code for forms:
| Generic selection |
Copy Code |
|---|---|
ARRAY TEXT(aObjectType;12)
ARRAY TEXT(aObjectValue;12)
ARRAY LONGINT(aObjectPos;12;4)
ARRAY TEXT(aResults;0)
aObjectType{1}:="Groupbox"
aObjectValue{1}:="new entry form"
aObjectPos{1}{1}:=5  // left
aObjectPos{1}{2}:=3  // top
aObjectPos{1}{3}:=435  // right
aObjectPos{1}{4}:=100  // bottom
aObjectType{2}:="Label"
aObjectValue{2}:="Entry 1 Text / Check:"
aObjectPos{2}{1}:=15
aObjectPos{2}{2}:=25
aObjectPos{2}{3}:=140
aObjectPos{2}{4}:=40
aObjectType{3}:="Label"
aObjectValue{3}:="Entry 2 Dropdown:"
aObjectPos{3}{1}:=15
aObjectPos{3}{2}:=50
aObjectPos{3}{3}:=140
aObjectPos{3}{4}:=65
aObjectType{4}:="Label"
aObjectValue{4}:="Entry 3 Date / Icon:"
aObjectPos{4}{1}:=15
aObjectPos{4}{2}:=75
aObjectPos{4}{3}:=140
aObjectPos{4}{4}:=90

aObjectType{5}:="Text"  // Text
aObjectValue{5}:="9:20"
aObjectPos{5}{1}:=150
aObjectPos{5}{2}:=25
aObjectPos{5}{3}:=285
aObjectPos{5}{4}:=40
aObjectType{6}:="Dropdown"
aObjectValue{6}:="Value2;Value1;Value2;Value3"
aObjectPos{6}{1}:=150
aObjectPos{6}{2}:=48
aObjectPos{6}{3}:=285
aObjectPos{6}{4}:=66
aObjectType{7}:="Date"
aObjectValue{7}:="1.1.2013"
aObjectPos{7}{1}:=150
aObjectPos{7}{2}:=75
aObjectPos{7}{3}:=240
aObjectPos{7}{4}:=90

aObjectType{8}:="Checkbox"
aObjectValue{8}:="True"
aObjectPos{8}{1}:=300
aObjectPos{8}{2}:=25
aObjectPos{8}{3}:=425
aObjectPos{8}{4}:=40
aObjectType{9}:="Combobox"
aObjectValue{9}:="Value99;Value4;Value5;Value6"
aObjectPos{9}{1}:=300
aObjectPos{9}{2}:=48
aObjectPos{9}{3}:=425
aObjectPos{9}{4}:=66
aObjectType{10}:="Icon"
aObjectValue{10}:="25885"
aObjectPos{10}{1}:=300
aObjectPos{10}{2}:=70
aObjectPos{10}{3}:=324
aObjectPos{10}{4}:=94

aObjectType{11}:="OK"
aObjectValue{11}:="OK"
aObjectPos{11}{1}:=335
aObjectPos{11}{2}:=105
aObjectPos{11}{3}:=435
aObjectPos{11}{4}:=127
aObjectType{12}:="Abort"
aObjectValue{12}:="Cancel"
aObjectPos{12}{1}:=225
aObjectPos{12}{2}:=105
aObjectPos{12}{3}:=325
aObjectPos{12}{4}:=127
Generic_Selection (440;133;->aObjectType;->aObjectValue;->aObjectPos;->aResults)
If (OK=1)
My_Alert(aResults{6})
End if | |
Example codes for alerts and requests
| To show a message box: |
Copy Code |
|---|---|
My_ALERT ("Test") My_ALERT2 ("Test1";"Test2";"Test3") | |
| Confirmation request |
Copy Code |
|---|---|
My_CONFIRM ("Please confirm") If (OK=1) My_ALERT ("confirmed") End if | |
| Value request |
Copy Code |
|---|---|
vText:=My_REQUEST ("Please insert value") If (OK=1) My_ALERT (vText) End if | |
| Choice request |
Copy Code |
|---|---|
vNum:=My_Choice ("Alternative 1";"Alternative 2") Case of : (OK=0) // Cancel : (vNum=1) My_ALERT ("You have chosen Alternativ 1") : (vNum=0) My_ALERT ("You have chosen Alternative 2") End case | |
| Selection list |
Copy Code |
|---|---|
ARRAY TEXT(cbodynamiccbo;3)
cbodynamiccbo{1}:="Value 1"
cbodynamiccbo{2}:="Value 2"
cbodynamiccbo{3}:="Value 3"
cbodynamiccbo:=2
vText:=My_CBO ("Please choose")
If (OK=1)
My_ALERT (vText)
End if | |
Example codes for date selection:
| With default date set to current date |
Copy Code |
|---|---|
cwSelectDate:=Current date(*) CW_SetPrefs CW_SetDate (cwSelectDate) CW_OpenDialog If (OK=1) My_ALERT ("Date is "+String(cwSelectDate)) End if | |
| With default date set to first of current month |
Copy Code |
|---|---|
cwSelectDate:=date("01."+string(month of (current date(*)))+"."+string(year of (current date(*)))) CW_SetPrefs CW_SetDate (cwSelectDate) CW_OpenDialog If (OK=1) My_ALERT ("date is "+String(cwSelectDate)) End if | |
| Default date is always current date |
Copy Code |
|---|---|
CW_SetPrefs CW_SetDate CW_OpenDialog If (OK=1) My_ALERT ("date is "+String(cwSelectDate)) End if | |
A complete overview of internal 4D commands can be found at:
http://doc.4d.com/4Dv12/4D/12.4/4D-Language-Reference.100-976885.en.html